 I wrapped my nieces first birthday present and I used Washi Tape to dress up plain white wrapping paper as seen in this post.
I created a bow made from Washi Tape and here is how I did it:
Materials
Washi Tape [mine was .5" wide]
Scrap wrapping paper
Stapler
First you'll need to make the Washi Tape "ribbons". I did this by taking my scrap wrapping paper [white] and cut it into 5 strips 9.5" long by .5" wide [the strips need to be the same width as your Washi Tape] and one strip about 4" long by .5" wide.
[Note: this is what looked good on this size of a present you may need to adjust]
Start by laying a strip of wrapping paper on a table
You are going to cover the entire strip of wrapping paper with tape. The best way to do this is by going very slowly and sticking a little bit of the tape to the table above your strip of wrapping paper.
Use both hands; one to unroll the tape and one to guide it evenly onto the wrapping paper.
Keep going all the way to the end of the wrapping paper.
Once that side is done flip it over and repeat the same process on the other side.
Now you have a "ribbon" of Washi Tape
Repeat until you have 5 long strips and 1 short strip.
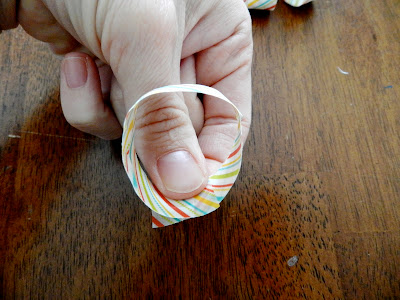
Now to make the bow. Take one strip and fold until the two ends meet.
As in picture:
Take another strip and do it again but going the other direction.
Always hold the ribbons in the middle where they all meet. Take another strip and repeat.
Once the bow gets bigger I found it easier to hold one part of the strip while I wrapped the other around the bow.
At this point make any adjustments to your "ribbons" and even out bow, remember to keep one hand holding the middle.
Once you are happy with the placement of the ribbons staple the center where you are holding.
Feed the bow into the stapler carefully.
Now to finish it... Take your last long piece of "ribbon" and start looping it as I did in the picture:
You are making a figure 8 with this piece, keep your finger in the middle until it looks even
Once its even take your roll of Washi Tape and tape this figure 8 to the bow.
Grab the short "ribbon" and make a loop, tape the loop together.
Attach loop to middle of bow between your figure 8.
And thats how you make a Washi Tape Bow
Monday Funday
Tuesday Confessional
Ginger Snap Crafts
Show & Tell Link Party
The Pin Junkie
Made in a Day
Tatertots & Jello
Serenity Saturday
Mommy Archive


So cute!
ReplyDeleteGreat idea. I'll definitely have to give it a try.
ReplyDeleteJust made it! love it, it's very easy, but looks so great!
ReplyDelete